The PPF installation process is often treated as a black box by car owners — you drop your car off, wait a few days, and pick up something protected, without much understanding of what actually happened in between. Knowing what a proper installation involves matters for a practical reason: it’s exactly how you can tell a rushed, corner-cutting job from one that will genuinely protect your paint for years.
This guide walks through the full PPF installation process from start to finish — inspection, preparation, cutting, application, and curing — so you know what to expect, what questions to ask, and what separates quality work from a shortcut.
Step 1: Paint Inspection
Before anything touches the car, a trained installer inspects every panel under bright, angled lighting, documenting the paint’s current condition and identifying any existing chips, scratches, or swirl marks. This step matters more than it might seem — it isn’t just a formality, but a shared reference point between you and the installer about what the paint looked like going in, so there’s no confusion later about what the PPF is covering up versus what it’s protecting against going forward. Even brand-new cars need this step, since vehicles collect rail dust, transport film residue, and dealership polish before they ever reach your driveway.
Step 2: Decontamination Wash
The car receives a thorough hand wash using pH-neutral shampoo — never an automatic wash with brushes, which risks introducing new swirl marks right before the surface is meant to be sealed under film. This step focuses on removing surface dirt without adding fresh defects, often supplemented with an iron remover to dissolve embedded brake dust and industrial fallout, and a tar remover for bug splatter or asphalt residue picked up from recently paved roads.
Step 3: Clay Bar Treatment
A clay bar treatment follows the wash, lifting embedded contaminants that washing alone can’t remove — tiny bonded particles from the environment that sit on the paint surface even after a thorough clean. Skipping this step leaves microscopic debris trapped beneath the film once it’s applied, which can create tiny bumps or imperfections in the final finish.
Step 4: Paint Correction (If Needed)
If the initial inspection revealed swirl marks, light scratches, or oxidation, the installer performs machine polishing before any film goes on. This is a detail worth understanding clearly: PPF preserves flaws just as faithfully as it preserves a flawless surface. Correcting the paint first ensures the film locks in a clean, defect-free result rather than sealing existing imperfections underneath it permanently. If your car has been driven for a while without protection, budget for this step to add both time and cost to the overall installation.
Step 5: Panel Wipe-Down
A final wipe using an isopropyl alcohol (IPA) solution removes every trace of polish oils, wax, or silicone left behind from the previous steps. This step is invisible in the finished result but critical to it — any residue left on the surface compromises the film’s adhesion and can shorten its effective lifespan considerably.
Step 6: Film Cutting
Depending on the installer and the specific vehicle, PPF is either applied using precision pre-cut patterns designed for your exact car model, or cut by hand from bulk film rolls to match each panel. Pre-cut patterns, generated through computer software specific to your vehicle’s shape, tend to offer more consistent, repeatable results, while hand-cutting relies more heavily on the individual installer’s skill and experience. Either approach can produce excellent results in skilled hands, but it’s worth asking your installer which method they use and why.
Step 7: Application
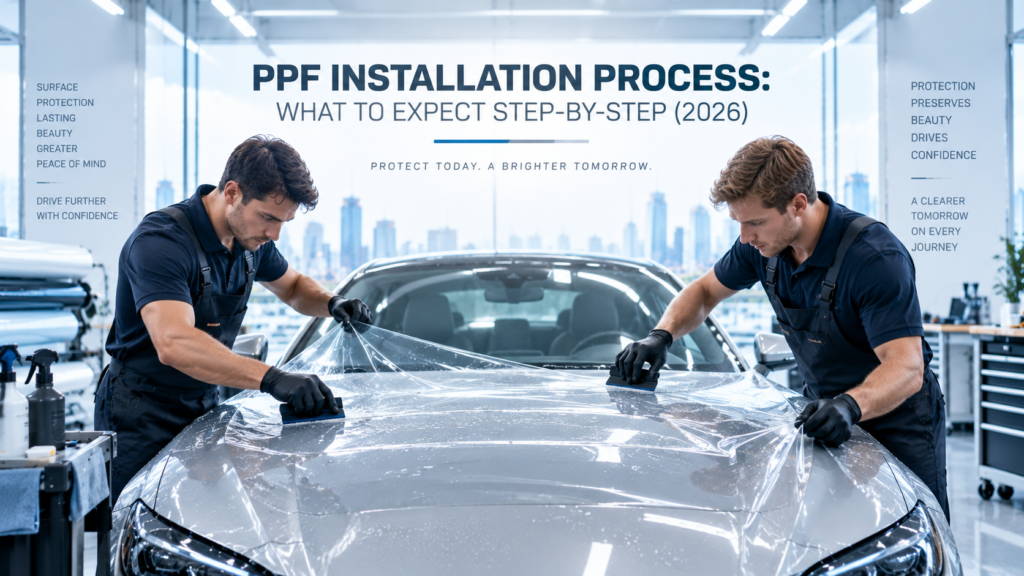
This is the stage most people picture when they think about PPF installation. The installer applies a slip solution to the panel, positions the film, and uses a squeegee to work from the center outward, removing excess solution and air bubbles with overlapping pressure strokes. A slow, methodical approach produces the sharpest, most bubble-free result — rushed application is one of the more common sources of visible imperfections in lower-quality installs. A heat gun is used throughout this stage to activate the film’s adhesive and help it contour smoothly around curves, edges, and complex body lines.
Step 8: Edge Tucking and Trimming
Wherever the panel design allows, edges are tucked into gaps and seams rather than left exposed on the surface — a finesse step that separates careful installers from rushed ones. Exposed edges look less refined and collect dirt and grime over time, gradually lifting at the corners. If tucking would require disassembling parts of the vehicle in a way that risks damaging clips or trim, an experienced installer will flag this and discuss the trade-off with you directly rather than forcing it. Excess film is then carefully trimmed, and edges are inspected closely to ensure tight adhesion, which directly affects how long the PPF resists peeling.
Step 9: Final Inspection
After every panel is complete, the vehicle is re-inspected under bright LED lighting from multiple angles, checking for trapped contamination, edge issues, alignment problems, or any spots where the film hasn’t fully bonded to the surface. A quality installer addresses any issues found immediately, rather than letting the car leave the shop with a defect that will only become more obvious — and harder to fix — over time.
Step 10: Curing Period
The film needs time to fully cure and bond to the paint after installation, typically taking anywhere from 48 hours to a full week depending on the specific film, climate, and installer’s guidance. During this window, the car generally shouldn’t be washed, and pressure washing in particular should be avoided entirely, since it can disturb the film before the adhesive has fully set. Given Malaysia’s frequent afternoon downpours, it’s worth asking your installer specifically how to handle unavoidable rain exposure during the curing period, since guidance can vary by film brand.
Common Myths About the PPF Installation Process
“Any car detailer can install PPF as well as a specialist.” Not quite — while general detailing skills help, PPF installation requires specific training in film handling, precision cutting, and edge work that differs meaningfully from standard detailing services like waxing or ceramic coating application.
“Faster installation means the installer is just more experienced.” Not necessarily. Quality PPF installation genuinely takes time — rushing through decontamination, correction, or curing to save hours often shows up later as edge lifting, trapped debris, or premature yellowing, regardless of how skilled the installer claims to be.
“You can wash the car normally the same day as installation.” This is one of the most common mistakes new PPF owners make. The curing period exists for a real reason — washing too soon, especially with pressure water, can disturb the film before the adhesive has fully bonded to the paint.
“Paint correction is always included in a PPF quote.” Not automatically. It’s only needed if the paint has existing swirl marks or damage, and skipping this step when it’s genuinely needed means sealing those imperfections under the film permanently.
How Long Does the Whole Process Take?
Professional PPF installation is typically performed in a dust-controlled studio and can take anywhere from a few hours for partial front-end coverage to several days for a full vehicle wrap, depending on coverage area and whether paint correction is needed beforehand. If you’re deciding how much of your car to cover, our Full Body PPF vs Partial Coverage guide breaks down which areas matter most if you’re not doing the entire vehicle.
What a Rushed Installation Looks Like
Understanding the proper process also helps you spot warning signs of a corner-cutting job. Red flags include skipping the clay bar or decontamination steps entirely, applying film directly over existing swirl marks without offering correction first, visibly exposed or poorly tucked edges, trapped dust or debris visible under the film in good lighting, and an installer unwilling to explain their process or answer questions about timeline and technique. A studio that rushes through installation in a fraction of the typical time for full coverage is worth treating with some skepticism, since quality PPF work simply cannot be meaningfully compressed without compromising the result.
Why Environment Matters as Much as Technique
A dust-controlled environment is a genuine requirement for quality PPF installation, not just a nice-to-have. Any airborne dust or debris that settles on the panel during application gets trapped beneath the film permanently, creating small visible bumps that no amount of skill in the application stage can fully avoid. This is part of why reputable installers work out of dedicated studio bays rather than open-air garages, and it’s a reasonable question to ask when comparing shops — what does their installation environment actually look like.
What to Ask Before Booking Your Installation
Given how much the quality of the PPF installation process varies between shops, a few direct questions before booking can save you from a disappointing result. Ask what their decontamination and correction process specifically involves, whether they use pre-cut patterns or hand-cut film for your vehicle, what their dust-controlled environment actually looks like, and how long they expect the full job to take given your car’s coverage requirements. A shop that answers these clearly and confidently is generally a better sign than one offering only a price and a rough timeframe without explaining what that price actually covers.
Malaysia-Specific Considerations for the Installation Process
A few local factors are worth keeping in mind when scheduling your PPF installation process in Malaysia. Given the country’s high humidity and frequent afternoon rain, curing time guidance can vary from what you’d read in guides written for drier climates — it’s worth confirming with your specific installer how local weather affects their recommended curing window rather than assuming a universal timeframe applies. Additionally, Malaysia’s intense year-round UV exposure makes the paint correction step particularly relevant for any vehicle that’s spent meaningful time parked outdoors before installation, since sun-related oxidation can be more pronounced here than in cooler, less consistently sunny climates.
Final Thoughts
The PPF installation process is considerably more involved than simply sticking film onto a car — a proper installation moves through ten distinct stages, from initial inspection through paint correction, precise application, careful edge work, and a genuine curing period afterward. Understanding this process gives you a real basis for comparing quotes and installers, since the difference between a quick, budget job and a careful, professional one often comes down to exactly which of these steps get skipped or rushed. Before booking your own installation, it’s worth asking your chosen installer to walk you through their specific process — a shop confident in their work will welcome the question, not deflect it.
Frequently Asked Questions
How long does PPF installation typically take?
Anywhere from a few hours for partial coverage to several days for a full vehicle wrap, depending on the coverage area and whether paint correction is needed beforehand.
Can I wash my car right after PPF installation?
No. The film needs a curing period, typically 48 hours to a week, during which washing — especially pressure washing — should be avoided to let the adhesive fully set.
Does PPF installation always include paint correction?
Not automatically. It’s only performed if the pre-installation inspection reveals swirl marks, scratches, or oxidation, since applying film over these flaws would seal them in permanently.
Why does the installation environment matter so much?
Airborne dust or debris that settles on the panel during application gets trapped under the film permanently, which is why a dust-controlled studio is a genuine requirement, not just a preference.
What’s the difference between pre-cut and hand-cut PPF patterns?
Pre-cut patterns are generated using software specific to your vehicle model for consistent fit, while hand-cutting relies more on the individual installer’s skill — both can produce excellent results with an experienced installer.